How to Build a BBQ Island in 7 Easy Steps
To build a BBQ island in 7 easy steps, start by planning your layout and design. Measure the space carefully and consider your utility needs like gas, water, and electricity. This will help you create a functional outdoor kitchen that fits perfectly in your backyard.
Next, choose durable materials such as steel for the frame and granite for the countertops. These materials can withstand the elements and keep your BBQ island looking great for years to come.
Prepare a stable foundation to support the structure, then assemble the frame using connectors and adjustable feet. This ensures your island is sturdy and level.
After that, install weather-resistant paneling to protect the frame. Cut and secure the countertops, then fit the grill insert precisely for a seamless look.
Finally, add accessories like shelves and hooks. Make sure everything is level and stable, and perform safety checks before use. Follow these simple steps to create a lasting and enjoyable outdoor cooking space.
Key Takeaways
– Measure your outdoor space and plan zones for cooking, prep, storage, and cleanup to ensure efficient workflow.
It’s all about making things easy and organized when you’re grilling.
– Select weather-resistant materials like steel tubing for the frame and granite or stainless steel for countertops.
These materials stand up to the elements and look great too.
– Assemble a sturdy, level frame using metal tubing, corner brackets, and adjustable feet for stability on uneven ground.
Getting the frame right is key to a solid BBQ island.
– Attach and level countertops, cut precise openings for the grill insert, and secure all surface components firmly.
Take your time here to make sure everything fits perfectly.
– Add accessories, tighten all fasteners, perform stability tests, and ensure safety before using your BBQ island.
Safety first! You want your setup to be both functional and secure.
Plan Your BBQ Island Layout and Design

Where do you begin when planning your BBQ island layout and design? First, measure your outdoor space carefully to determine the ideal size—typically between 5 to 8 feet wide and 2 to 3 feet deep.
Start by measuring your outdoor space to find the perfect size for your BBQ island layout.
Next, identify key zones: cooking, prep, storage, and cleanup, ensuring each area flows efficiently. When you build your island, plan for utility access points like gas, water, and electrical connections to support appliances and fixtures.
Sketch a detailed design showing where your grill, countertops, cabinets, and extras like side burners or refrigerators will go. Don’t forget to contemplate weather protection and ventilation to keep your outdoor cooking comfortable and safe.
Thoughtful planning lays the foundation for a functional, enjoyable BBQ island. So, take your time and make sure you cover all the bases before you start building!
Choose the Right Grill and Outdoor Appliances

You’ll want to pick a grill that matches your cooking style and fits your outdoor space, whether that’s propane, natural gas, or charcoal.
Don’t forget to take into account essential appliances like side burners, pizza ovens, or outdoor refrigerators to enhance your BBQ island.
Make sure everything you choose is built to withstand the elements and fits seamlessly into your design for safe, easy use.
Selecting Grill Types
How do you choose the right grill for your BBQ island? Start by considering the main types: gas, charcoal, and electric. Gas grills are the most popular for an outdoor BBQ island because they heat up quickly and give you precise temperature control.
If you want that classic smoky flavor, charcoal grills are great, though they need longer preheat times and more cleanup. Electric grills suit patios with flame restrictions and must be near outdoor outlets.
Size matters too—larger BBQ Grill Islands work well for entertaining, while smaller models fit everyday family meals. Whatever you pick, make sure your grill and appliances are rated for outdoor use and can handle moisture and UV exposure to guarantee durability and safety.
Essential Outdoor Appliances
What appliances will make your BBQ island both functional and durable? Start by choosing an outdoor-rated grill about 46 inches tall and 62 inches wide to fit your outdoor kitchen design perfectly.
Opt for weather-resistant, stainless steel appliances like refrigerators or beverage centers. These will withstand the elements and keep your setup looking sharp.
Adding side burners, pizza ovens, or griddles expands your cooking options. This makes your BBQ island more versatile and fun to use.
Make sure all appliances match your utility hookups—gas, electric, or propane—and comply with local safety codes. You don’t want any surprises when it’s time to install everything.
Prioritize high-quality, durable units from trusted brands. This guarantees longevity and reliable performance.
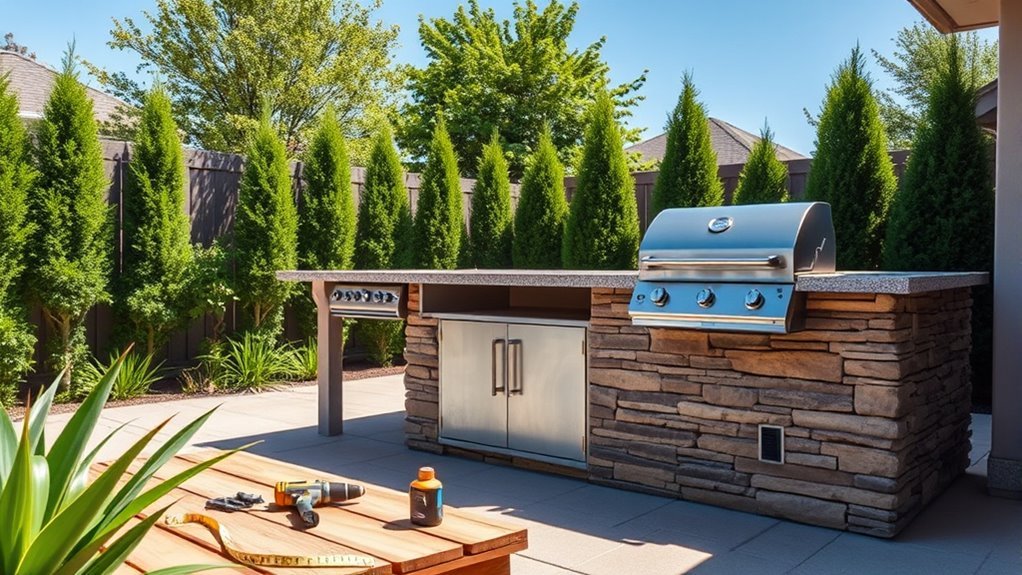
Select Materials for the Frame and Surfaces
You’ll want to pick the right materials for your BBQ island’s frame and surfaces to guarantee durability and weather resistance. Steel or aluminum tubing works well for the frame, while stainless steel or composite panels hold up great on the exterior.
Don’t forget to measure carefully and choose surface options like granite or concrete that fit your style and outdoor conditions. It’s all about making sure your BBQ island looks good and lasts long outdoors.
Frame Material Options
Since your BBQ island needs to withstand outdoor conditions and support heavy appliances, choosing the right frame material is essential. To build an outdoor BBQ island that lasts, consider aluminum tubing—it’s lightweight, corrosion-resistant, and easy to cut and assemble, perfect for your outdoor space.
If you want extra strength, steel framing offers superior durability and can handle heavy countertops and grills. Wood framing is affordable and simple to work with but requires weatherproofing to prevent moisture damage.
For a permanent, sturdy option, concrete blocks provide solid support but need a stable foundation due to their weight. Whatever you choose, use metal or steel connectors and brackets to secure joints and maintain frame stability over time.
This ensures your BBQ island stays safe and reliable for years.
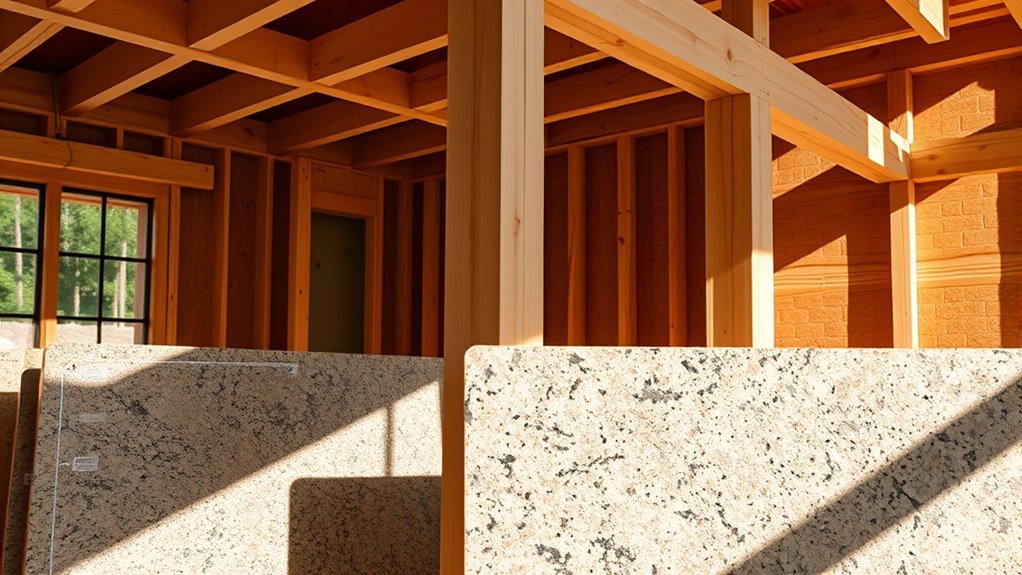
Surface Material Choices
Although selecting the right frame material is essential, choosing durable, weather-resistant surfaces will protect your BBQ island from outdoor wear and tear. For your surface material, consider stainless steel, composite, or granite, as these stand up well to the elements.
Concrete or stone slabs also make excellent countertops, providing sturdy, heat-resistant areas perfect for cooking. Make sure the surface material has a non-porous finish to prevent staining and mold from moisture.
Use weatherproof adhesives and fasteners to securely attach everything, ensuring long-lasting durability. By carefully selecting weather-resistant surface materials, you’ll create a BBQ island that not only looks great but also withstands outdoor conditions.
This way, your outdoor cooking setup stays both functional and resilient for years to come.
Weather Resistance Considerations
When selecting materials for your BBQ island, focus on weather resistance to guarantee longevity and performance. Choose galvanized or powder-coated metals like aluminum or stainless steel for framing to avoid rust and corrosion.
For countertops, pick weatherproof surfaces such as quartz or granite that handle moisture and temperature shifts. Use sealed or waterproofed paneling like composite wood to prevent water damage. Don’t forget to seal all joints with outdoor-grade caulking to keep water out.
Opt for UV-resistant finishes to maintain outdoor durability and appearance over time.
| Material Type | Recommended Options |
|---|---|
| Frame | Aluminum, Stainless Steel |
| Countertops | Quartz, Granite, Stainless Steel |
| Paneling & Finishes | Composite Wood, UV-resistant Coatings |
Prepare the Foundation and Base Structure
To build a reliable BBQ island, you’ll need to start by selecting a level, stable surface like concrete, pavers, or a properly reinforced wooden deck. This foundation is vital for your Outdoor Living space and ensures your structure stands strong.
Plan your base dimensions to handle the weight of your grill, appliances, and countertops. Usually, 5-8 feet wide and 2-3 feet deep works well.
Plan your BBQ island base at 5-8 feet wide and 2-3 feet deep to support heavy grills and appliances.
When you Build a DIY Outdoor BBQ island, focus on these essentials:
- Choose a flat, sturdy surface for stability
- Design the base size to support heavy loads
- Use adjustable feet for levelness on uneven ground
- Reinforce with cross braces to prevent wobbling
These steps set a solid foundation for your BBQ island’s lasting durability. It’s all about making sure your setup stays steady for years to come.
Assemble the Frame Using EZTube or Metal Tubing
Since a sturdy frame forms the backbone of your BBQ island, start by cutting EZTube aluminum or steel tubing to match your design measurements. Use corner brackets, T-connectors, and cross braces to connect tubing sections, forming the base and vertical supports.
Tighten each connection securely with EZTube’s snap-in or screw-in system—no welding needed. Don’t forget to install adjustable feet at the bottom of the vertical supports to level your frame on uneven ground.
Reinforce key stress points with extra cross braces or connectors to ensure your DIY outdoor kitchen frame can support countertops and the grill insert. This solid framework sets you up for a durable, professional-looking BBQ island that complements your outdoor kitchen perfectly.
Install Paneling, Countertops, and Grill Insert
With your sturdy frame securely in place, you can now attach stainless steel or composite paneling to the sides and back using weather-resistant fasteners. This creates a durable surface perfect for BBQ Islands designed for outdoor grilling.
Next, measure and cut your chosen countertop material—granite, concrete, or stainless steel—to fit precisely. Secure it firmly to the frame, using a level to ensure a flat workspace.
Finally, mark and cut the countertop for your grill insert, then install it carefully, checking alignment and airflow.
Remember to:
- Use weather-resistant fasteners for paneling
- Measure twice before cutting countertops
- Level the countertop for even cooking surface
- Verify grill insert stability and airflow
These steps guarantee a solid, functional outdoor grilling station. Easy, right? Just take your time and enjoy the process!
Add Final Accessories and Ensure Stability
How exactly do you guarantee your BBQ island stays steady and fully functional? Start by securely attaching all final accessories like spice racks, tool hangers, and LED lighting using the right fasteners to maintain stability.
Double-check that the structural frame and paneling are tightly fastened to prevent any wobbling during outdoor cooking. Use adjustable feet on the island’s base to level it perfectly, especially on uneven surfaces.
Make sure the grill insert fits snugly within its cutout and doesn’t shift when in use. Finally, perform a stability test by gently rocking the island; tighten fasteners or adjust the leveling feet as needed.
These steps ensure your BBQ island remains stable and ready for enjoyable outdoor cooking experiences. Easy, right? Just a little attention here and there, and you’re all set!
Conclusion
Now that you’ve built your BBQ island from scratch, imagine the contrast between the empty backyard you started with and the vibrant cooking hub you’ve created.
Where once there was nothing but space, now there’s a sturdy frame, sleek countertops, and a sizzling grill ready for action. You’ve turned plans into reality, transforming simple materials into a gathering spot full of warmth and flavor.
Your backyard’s never looked—or smelled—better. This BBQ island isn’t just a structure; it’s the heart of outdoor entertaining. Whether it’s family dinners or weekend cookouts, you’ve created the perfect place to enjoy great food and good company. Building your own BBQ island has truly elevated your outdoor living space to the next level.