10 Steps to Clean a BBQ Grill With Vinegar and Baking Soda
Start by gathering vinegar, baking soda, and cleaning tools, then remove your BBQ grill grates. These simple household items make cleaning your grill easy and eco-friendly.
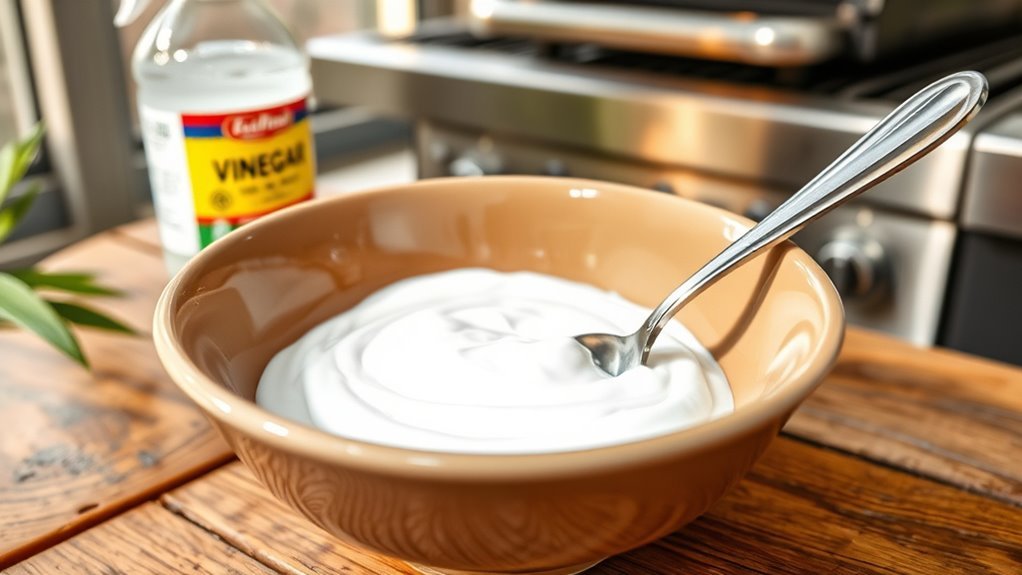
Mixing baking soda with water creates a natural paste that helps tackle tough grime without harsh chemicals. Mix baking soda with water to create a paste and spread it evenly over the grates.
Let the paste sit for several hours to loosen grime. This gives the baking soda time to break down stubborn residue.
Next, scrub thoroughly with a brush or aluminum foil ball. Spray vinegar to break down grease, then rinse everything well.
The vinegar reacts with the baking soda, fizzing away grease and making cleanup a breeze.
Dry all parts completely before reassembling and seasoning the grates.
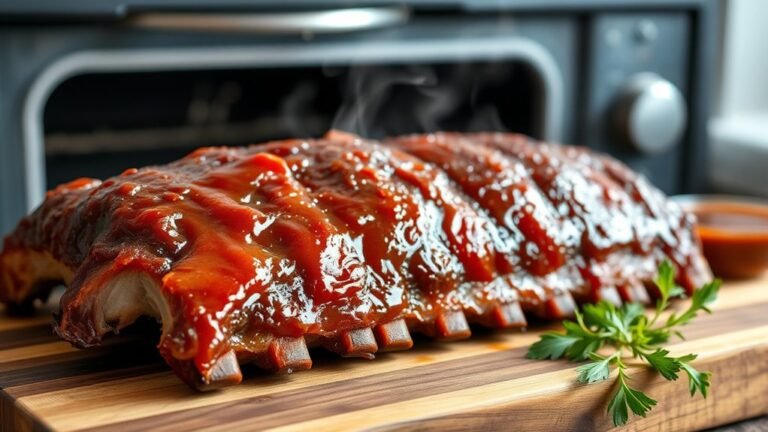
Keeping your grill clean not only improves cooking but also extends its life. Keep following these steps to guarantee your grill stays spotless and ready for cooking.
Key Takeaways
- Make a baking soda paste with 1½ cups baking soda and ½ cup water; apply evenly to cool grill grates and let sit overnight.
- Spray vinegar onto grill grates and interior surfaces to loosen grease and baked-on food before scrubbing.
- Scrub grates with a stiff brush or crumpled aluminum foil, focusing on grooves and stubborn residue.
- Rinse grill grates thoroughly with warm water and wipe interior surfaces clean to remove all residue.
- Dry all parts completely, reassemble, then oil and heat the grates to create a protective seasoning layer.
Gather Your Cleaning Supplies
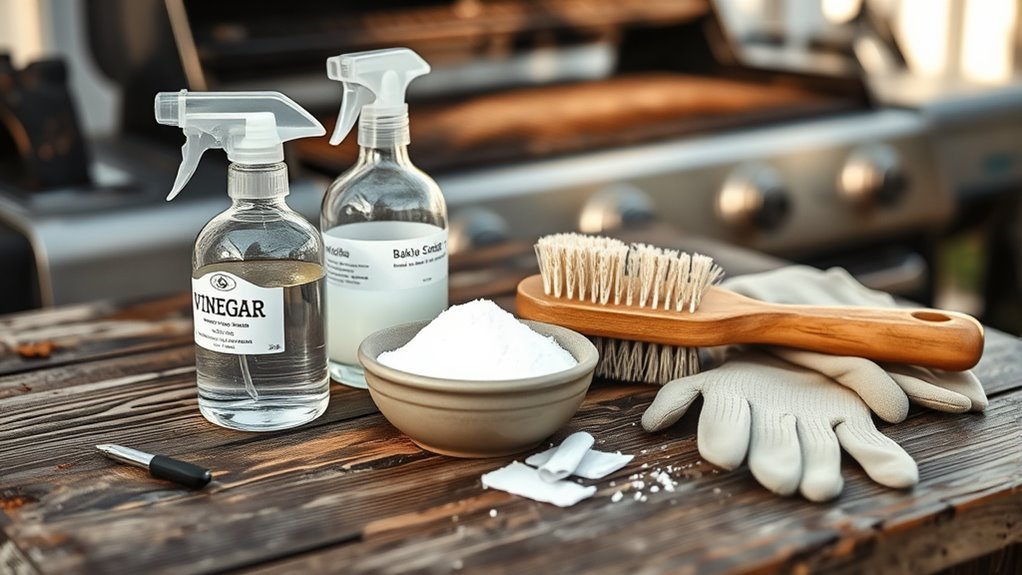
Before you plunge into cleaning your BBQ grill, gather all the necessary supplies to make the process smooth and efficient. You’ll need white vinegar, baking soda, a scrub brush or scourer sponge, a spray bottle, and a clean cloth or paper towels.
Get your cleaning gear ready—vinegar, baking soda, brush, spray bottle, and cloth—for an easy BBQ grill cleanup.
Make sure your cleaning tools are dry and free of debris before starting. Check you have at least 1½ cups of baking soda and around 2 cups of vinegar ready.
Prepare a mixing bowl or container to combine the baking soda with a little water, creating a paste or solution. Don’t forget to wear rubber gloves to protect your hands from any residues or splashes during cleaning.
Having everything on hand lets you clean your grill thoroughly and efficiently. It just makes the whole thing way easier!
Remove the Grill Grates
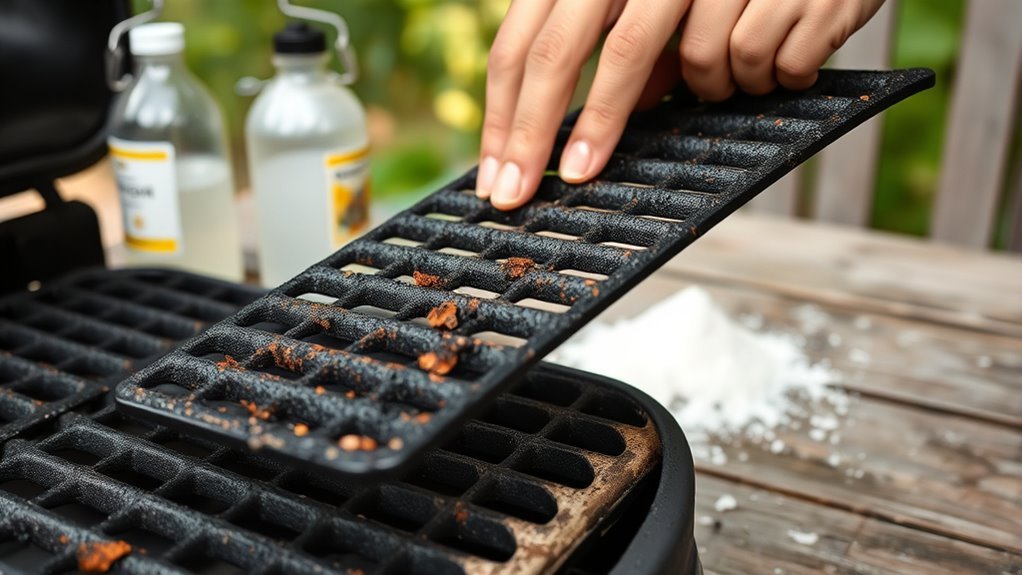
Start by carefully lifting the grill grates out of your BBQ, making sure to disengage any fasteners or clips first. Wear heat-resistant gloves to protect your hands from burns, especially if the grill is still warm.
Place the grates on a flat, stable surface for easy cleaning. Before soaking, inspect the grill grates for rust, damage, or heavy buildup that might require replacement.
Use a brush or scraper to remove loose debris and food particles.
| Step | Action |
|---|---|
| 1. Remove grates | Disengage clips and lift carefully |
| 2. Safety | Wear heat-resistant gloves |
| 3. Inspect & Prep | Check condition, remove loose debris |
This prepares your grill grates for effective cleaning.
Prepare a Baking Soda and Water Paste
While your grill grates are ready, mix 1½ cups of ARM & HAMMER Baking Soda with ½ cup of water, adding the water slowly to create a thick, spreadable paste. Gradually adding water helps you control the consistency, ensuring the paste isn’t too runny or dry.
If needed, adjust the ratio slightly to maintain a texture that sticks well to the grates. This baking soda paste is key for a deep clean, as it gently breaks down grease and grime.
Once prepared, you’ll have a powerful, natural cleaner ready to tackle your BBQ grill’s toughest buildup. Keep the paste thick enough so it adheres well, making your next step—applying it to the grill grates—more effective in achieving a spotless clean.
Apply the Paste to the Grill Grates
Once you’ve prepared the baking soda paste, use a brush or sponge to spread a thick, even layer over the grill grates. Focus on spots with heavy buildup.
But make sure the grates are cool before applying to avoid splatters. Let the paste sit for several minutes so it can break down the grime effectively.
Preparing the Baking Soda Paste
Although it’s tempting to apply the baking soda paste right away, you should wait until your grill is completely cool to avoid any damage.
Start by mixing 1½ cups of baking soda with just enough water to form a thick, spreadable paste. Make sure the consistency isn’t too runny; it needs to stick well to the grill grates.
Once your paste is ready, grab a brush or sponge to spread it thoroughly across all the grates. Focus extra attention on heavily soiled spots where grease and grime have built up.
Let the baking soda paste sit for several minutes—this will help loosen baked-on residue and make scrubbing easier later. Preparing the paste carefully guarantees a more effective cleaning process.
Applying Paste Evenly
After your baking soda paste has had time to sit and loosen the grime, it’s time to spread it evenly across the grill grates. Use a brush or sponge to apply the baking soda paste generously, focusing on heavily soiled spots to maximize grime removal.
Work the paste into the grooves and crevices with a back-and-forth motion to ensure thorough coverage. Be sure the grill is completely cool before applying the paste to avoid burning or uneven spreading.
Wearing a glove or using a tool helps you spread the baking soda paste without direct contact, giving you consistent application. This even spread allows the baking soda to do its job effectively, loosening grease and char, setting you up perfectly for the next cleaning steps.
Letting Paste Sit
When you’ve spread the baking soda and vinegar paste over the grill grates, let it sit for at least 8 to 12 hours or overnight to loosen tough grime effectively. During this time, the chemical reaction breaks down grease and charred deposits, making cleanup easier.
Be sure to cover the grill to protect the paste from debris and maintain consistent soaking conditions. Before applying the paste and letting it sit, make sure the grill is completely cool to avoid burns.
Resist the urge to disturb the paste during this period; letting it sit undisturbed ensures the grime softens thoroughly. Covering and allowing the paste to work overnight is essential for achieving the best results when cleaning your BBQ grill grates.
Let the Paste Sit to Loosen Grime
Since the baking soda and vinegar paste needs time to work, you should let it sit on the grill grates for at least 8 to 12 hours or overnight. This waiting period allows the paste to break down stubborn grime, grease, and carbon deposits effectively.
Cover the grill or seal the grates in a bag to trap heat, boosting the cleaning power. Avoid rinsing or scrubbing immediately; letting the paste penetrate deep ensures grime loosens thoroughly.
| Time Duration | Purpose | Tip |
|---|---|---|
| 8-12 hours | Break down grease and grime | Cover grill for heat trap |
| Overnight | Deep penetration into crevices | Avoid early scrubbing |
| Sealed bag | Enhance chemical reaction | Keeps paste moist |
Letting the baking soda paste work patiently is key to a cleaner grill. Just give it time, and you’ll see the difference!
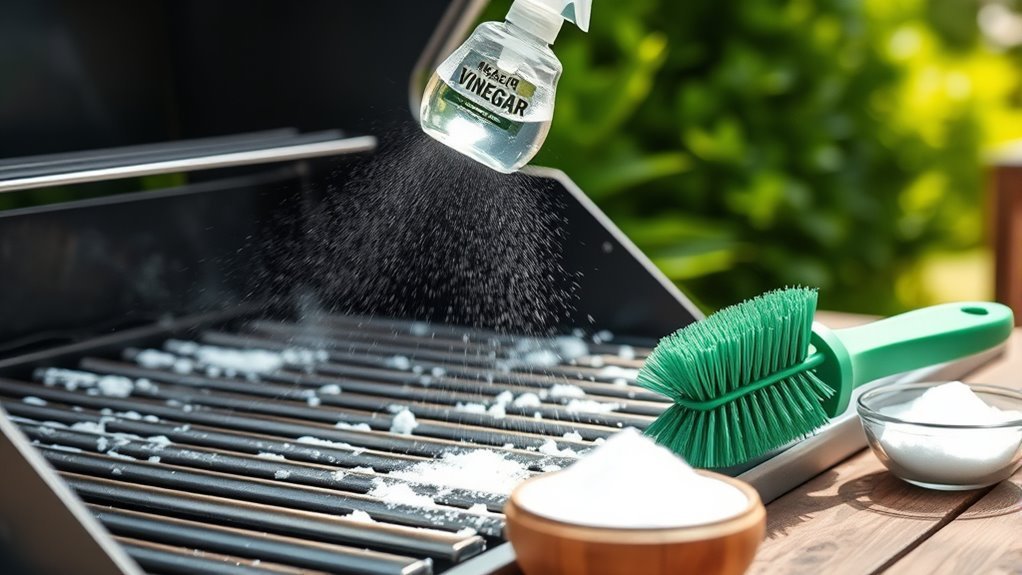
Spray Vinegar on the Grill Interior
While the baking soda paste works its magic, you can spray white vinegar onto the grill’s interior surfaces to tackle grease and grime buildup. Use a spray bottle to generously coat all areas, especially spots with stubborn grease.
Make sure the vinegar reaches every corner and hard-to-clean space inside the grill. Let it sit for 5 to 10 minutes; this gives the vinegar’s acetic acid time to break down the tough residue and loosen baked-on food.
This reaction makes it easier for you to clean the grill thoroughly by loosening grime before scrubbing. Once the vinegar has soaked and done its job, you’ll find the interior much easier to wipe down and get completely clean, setting you up perfectly for the next step.
Scrub the Grill Grates Thoroughly
Grab a crumpled ball of aluminum foil or a stiff brush to tackle those grill grates. Focus on scrubbing away stubborn grease, burnt-on food, and residue, especially in grooves and corners.
Using these tools while the grates are warm will make removing grime much easier. It’s a simple trick that really works!
Effective Scrubbing Tools
Although cleaning grill grates can be tough, using the right scrubbing tools makes the job much easier and more effective. Start with a stiff-bristled grill brush or a wire scrubber to remove loose debris and burnt-on bits.
Before scrubbing, dampen the grates with water to help your tools glide smoothly and reduce the risk of scratching. To reach grooves and corners, grab a scouring pad or nylon scrub sponge for a thorough clean.
After scrubbing, rinse the grates well to wash away loosened residue. These tools work together to get your grill grates sparkling clean and ready for seasoning or cooking. This way, you tackle grime efficiently without damaging the surface.
Targeting Stubborn Residue
Two simple tools can make a big difference when tackling stubborn residue on your grill grates: a crumpled aluminum foil ball and a stiff-bristled brush. Start by applying a generous layer of baking soda paste or sprinkling baking soda directly onto the grill grates. Let it sit for 10-15 minutes to break down baked-on grease and charred food.
Then, scrub thoroughly with your chosen tool, focusing on tough spots. Use a damp scourer sponge or wire brush for effective scrubbing. Make sure to target areas with the most baked-on grime first.
After scrubbing, rinse the grates with water to remove loosened residue and baking soda. If some stubborn buildup remains, just repeat the process. This method guarantees your grill grates are clean and ready for your next BBQ session.
Rinse the Grates and Grill Interior
Start by rinsing the grill grates thoroughly with warm water to wash away loose debris and any leftover cleaning agents. Use a garden hose or sink spray nozzle to make certain all baking soda and vinegar residues are completely removed.
Next, wipe down the interior of the grill, including the lid and sides, with a damp cloth to clear away any remaining grime. For stubborn spots, gently scrub with a sponge or brush dipped in clean water, then rinse again to keep the grill clean.
This step guarantees that no cleaning residue remains that could affect the taste of your food. Taking time to rinse properly prepares your grill for the final drying process and keeps it ready for your next cookout.
Dry All Components Completely
Make sure all your grill parts are completely dry before putting them back together to avoid rust and damage. Use a dry cloth or paper towels to wipe off moisture, and let components air dry in a well-ventilated area for at least 30 minutes.
If you’re in a hurry, placing parts in direct sunlight or near a fan can speed up the drying process. Just take your time to ensure everything is fully dry, so your grill stays in great shape!
Importance of Thorough Drying
Although cleaning your grill with vinegar and baking soda removes grime and residue, drying every component completely is essential to prevent rust and corrosion. Moisture left on cast iron or steel surfaces invites rust, which can shorten your grill’s lifespan.
To keep your BBQ in top shape, make sure you use a clean, dry towel or paper towels to wipe all parts thoroughly. Don’t forget to pay special attention to corners and crevices where water can hide.
Also, allow components to air dry in a well-ventilated space. And try to avoid storing parts while they’re still damp to prevent corrosion.
Methods to Speed Drying
Several effective methods can help you speed up the drying process after cleaning your BBQ grill, ensuring every component is completely moisture-free. Start by wiping all parts thoroughly with a clean, dry towel to remove excess water.
Next, place the grill components in a well-ventilated area or outside under direct sunlight—ventilation and natural heat dramatically accelerate drying. You can also turn the grill on a low heat setting for 10-15 minutes; this helps evaporate any remaining moisture from metal surfaces.
To boost airflow further, position a fan or dehumidifier nearby, reducing humidity around the parts. Avoid stacking or covering damp items immediately, as this traps moisture and slows drying.
Following these steps guarantees your grill parts dry quickly and completely, preventing rust and ensuring safe, enjoyable BBQ sessions. Easy, right? Just a little effort goes a long way!
Reassemble the Grill and Season the Grates
Once you’ve thoroughly dried the grates, go ahead and reassemble the grill carefully. This step is important to make sure everything fits securely and functions properly.
Proper reassembly keeps your grill safe and ready for use. Next up, season the grates to protect them and boost your cooking performance.
Proper reassembly ensures safety and sets the stage for seasoning to enhance your grill’s performance.
Just apply a thin layer of vegetable oil or a grill-specific oil using a paper towel or brush. Then, close the lid and heat the grill on medium for 15-20 minutes.
This helps the oil polymerize, creating a non-stick surface. Remember to dry the grates completely beforehand to prevent rust.
Also, make sure you apply a thin, even layer of oil. Heating the grill like this sets the seasoning nicely.
You’ll want to repeat the seasoning process periodically to keep things in top shape. This way, your grill grates stay protected and ready for some flavorful grilling.
Conclusion
Now that you know how to clean your BBQ grill with vinegar and baking soda, you’re ready to keep it sparkling and ready for your next cookout.
Did you know that a clean grill can reduce harmful carcinogens in your food by up to 50%? Taking just a little time to clean your grill not only improves flavor but also keeps your meals healthier.
So grab your supplies and give your grill some well-deserved TLC! Regularly cleaning your BBQ grill with vinegar and baking soda is an easy, natural way to maintain your grill’s performance and extend its life. Plus, using these simple ingredients means no harsh chemicals, making it safer for you and the environment.
Keep your BBQ grill in top shape, and enjoy tastier, healthier meals every time you fire it up!